Getting Started
Check out our Full Install VIDEO or Quick Start Guide for what to expect from a DIY install and tools required. We’ve summarized what you need to know below, but if you have any other questions, feel free to give us a call at 888-637-4493.
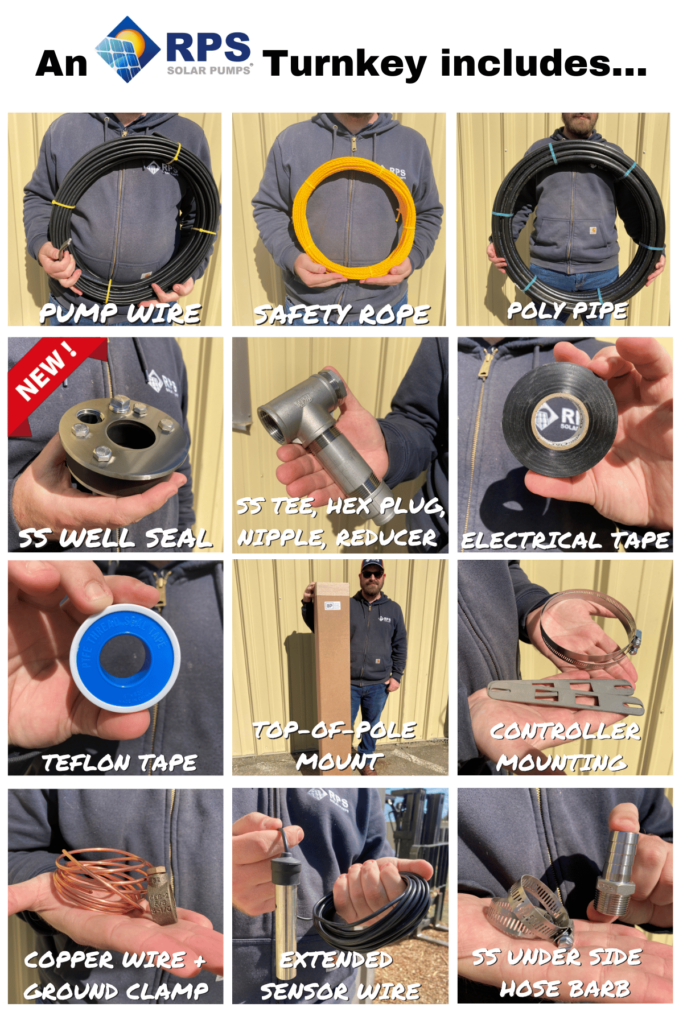
Make Your Install Easy with a Turnkey Kit!
If you haven’t already, think about adding on a Turnkey Kit for no-hassle set-up available in 100ft, 200ft and 300ft lengths (includes all the items listed below + RPS Top of Pole Mounting!!). For the RPS Top of the Pole Mount (INSTALL VIDEO), make sure to remember that the 2 panel mount requires a customer-supplied 2 3/8″ OD Schedule 40 steel pipe. Full color Diagrams and some great Photos from customers to give you some ideas moving forward.
Our in house engineers are available to you before, during and after installation so please feel free to reach out at anytime if you have any unanswered questions. TEXT Engineers here too 888-637-4493.
Installation Manual
You will have a comprehensive, full color, 35 page installation manual in your main pump box. It will help walk you through the whole process from wiring panels, splicing wires and powering batteries to field troubleshooting.
Tools to have on hand
-Wire stripper/crimper
-Screwdrivers (both types)
-Electrical tape and Pipe Tape
-Heat gun or lighter for the waterproof heat-shrink wire covers
-multimeter to ensure you’re getting proper voltage from panels (optional. If you’d like one, ask us about adding on a “Goof Proof” multimeter to your order)
Other items to have on hand: Just to reiterate here that RPS has a Turnkey Kit, it’s a separate cost from what comes standard with the RPS pump items listed above, but the Turnkey will include absolutely everything you need for install except for the two parts we can’t just physically can’t send via package, the steel pole for the Top-of-Pole Mounting and a copper ground rod. (Home Depot/Lowe’s should have anything you don’t have already)
Parts
Sensor Wire (included with RPS Kit) – your kit will include 2 sensors, each with 100ft of wire attached. One is a low water sensor for inside the well that protects the pump from running dry and the other one is an above ground tank full sensor for a storage tank, instructing the pump to turn off when the tank is full. If you need additional sensor wire, any 18-2 Thermostat or 20-2 Bell wire will work. If you want to order this online in the future, here is a good choice 18-2 AWG Submersible for Sensors. If you are pumping directly into a pressure system or have a long pipe run, you will need our Reverse Action Pressure Switch and a check valve as a substitute for the tank full sensor. We also have a Wireless Tank Full Sensor as the “high tech” third option for long runs.
Pump Wire (included in Turnkey)– the pump comes with a 6ft pigtail of pump wire and the standard kit includes water proof heat shrink covers and crimps for splicing. Use 12 gauge submersible 3 strand wire. If you cannot find it locally and want to order online, we recommend 12 AWG Submersible and 10 AWG Submersible wire (over 200ft). RPS Splicing HowTo Video.
Down Pipe (included in Turnkey) -3/4″ or 1″ black poly pipe for plumbing water from pump to well head, 160 PSI or higher, something like this Poly Pipe . Your kit will come standard with the 3/4 inch pipe thread to hose barb fitting on the RPS 200. If you prefer 1 inch just let us know, we’ll include an adapter at no charge. RPS Plumbing Video.
Safety Rope (included in Turnkey)– 1/4 inch polypropylene rope or cable, usually yellow. You can also attach an eyebolt under the well cap to keep the rope out of sunlight, if you like.
Electrical tape + Plumbers Tape (Included in Turnkey)– for taping pump wire and sensor wire to drop pipe every 5-10 feet . It helps to have a nice bundle for lowering the pump! Plumbers tape for sealing up metal plumbing connections.
Well Seal (Included in Turnkey) -plumbing at the top of the of well to attach to the 3/4″ or 1 inch poly pipe. Some customers repurpose their solid well cap and drill a few holes. We have a Stainless Steel Metal Well Head Assembly available too and a great VIDEO on The Basics of Well Seals. If you’re in freezing country, we have a few recommendations for freeze protection options. The RPS 200 use a helical rotor mechanism that allows drain back, preventing frozen lines.
Grounding rod and bare copper wire (Included in Turnkey) to ground your solar panels and controller. Turnkey Kit will include copper wire, grounding lug to attach to controller and a grounding clamp to attach to a standard rod (not included).
Solar Panel Mounting (Included in Turnkey) – Mount ’em on a roof or build your own wood structure, we have more info about how you can use the DIY spirit to mount solar panels on your property.
Battery Backup – (optional) 12V Deep Cycle Batteries– All About Batteries VIDEO
AC or Generator Backup– (optional) It sort of feels like a secret, but the RPS 200, 400, 400V, 800, and 800V can take power from a 110V or 220V AC Grid or generator with help from the RPS Converter. Shop here.
Installation Reminders
-Make sure to match up + and – on the wires from the solar panels to the controller
-The pump should be a maximum of 125 feet below the water surface (not like an AC pump!)
-Pump will work fine with solar panels lying flat as long as they are in full sun for initial setup, ideally they are facing due south and tilted based on latitude and season for final install
-Be sure the pump is submerged when you connect the solar panels to prevent it from running dry and always a good idea to do a bucket test first before lowering the pump in a well.YouTube channel with lots of great Intro and Install info and we invite you to like our Facebook page.