Solar Water Pump Pro Series Full Install & Demo • RPS Solar Pumps
Intro
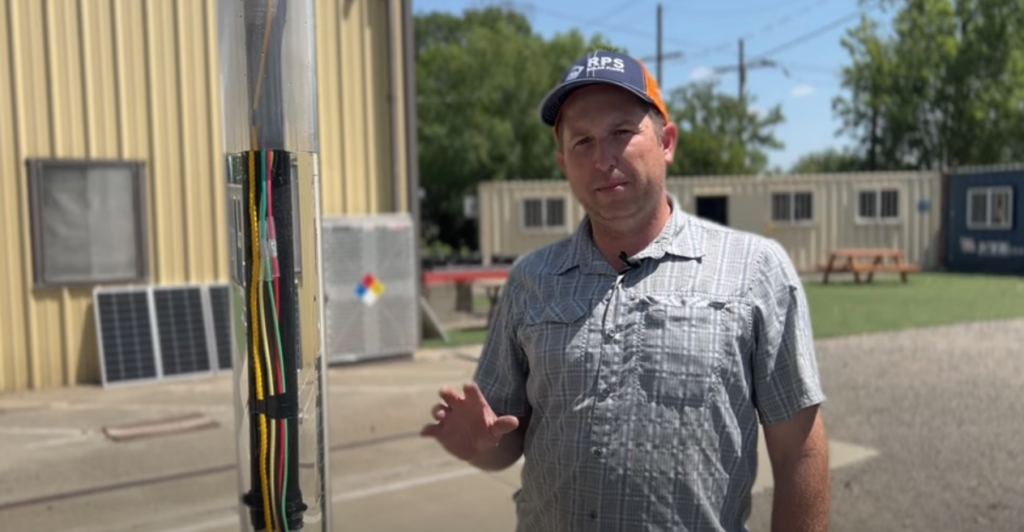
Hey, This is Mike with RPS Solar Pumps. I want to tell you about these Pro System Pumps that we’re sending all over the United States on a daily basis to get people up and pumping with solar power. This one’s going over to City Springs, New Mexico today and we ship all over the United States right to your door, ready to be set up.
I’m going to walk you through the installation steps, what the kits come with, and what you’re going to need to install your own submersible solar pump. So, we went ahead and put together this amazing display using a clear pipe in order to show you exactly how everything looks down the well. Normally we’re not able to see this because it’s down 50, 100, or 200 feet below the surface. This way you can check out all the components for our Pro Installation.
Down Well Parts
So let’s start at the bottom and work our way up. Down at the very bottom, we have our submersible pump motor. In this case, it’s a 1HP motor but we go up to 5 HP with our Pro Systems. Right here we have our pump end. This pump end is a 1HP pump end and it’s going to produce around 20 gallons per minute. As we work our way up, the outlet of this pump is an inch and a quarter. So across this whole install, we’re going to use inch and a quarter hardware and inch and a quarter black poly pipe to make for a simple installation.
We have our outlet nipple here going into a check valve. Now these pumps do have a built-in check valve, but if you’re doing a pressure system or you want to make sure it’s not going to drain back, then we definitely recommend adding in a secondary check valve to provide redundancy and make sure we’re not going to have any leaks. Now we need to transition to our black poly pipe and we do that using a hose barb. So it’s kind of hard to see, but down here we have a threaded hose barb that attaches to our black poly pipe using three hose clamps.
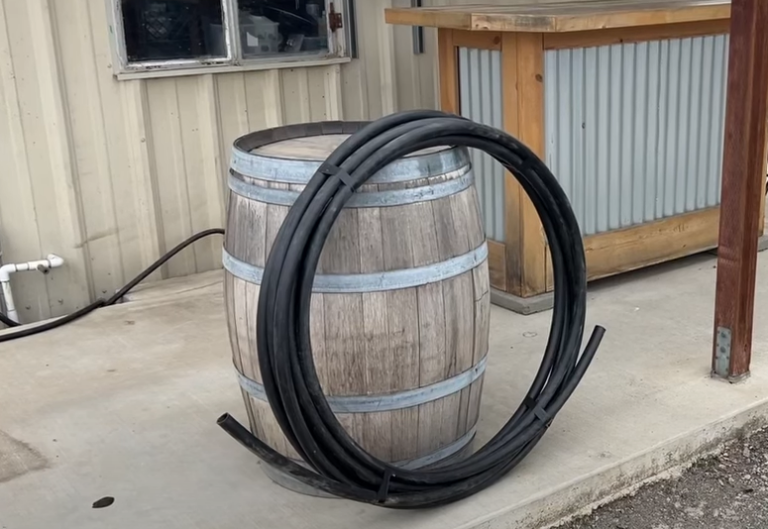
Now I went ahead for this installation and wrapped those hose clamps in electrical tape that covers up all the sharp edges and made sure it’s not going to chafe our pump wires. We have those hose clamps exposed, in case you want to see how they tighten down. Then we transition to our black poly pipe, also called our drop pipe. We have an entire video outlining all the different types of drop pipe, whether you want to use black poly pipe for ease of installation, PVC pipe if you’re doing a really deep install or galvanized steel pipe in case you’re going really deep on some of those 800 foot plus installations. They all have pros and cons, so check out the video and you’ll learn all about different types of drop pipe.
Poly Pipe
In this case, we’re using black poly pipe because it’s much easier to work with and is great for installs to around 300 to 500 feet deep. Up in the top here, we transition back to metal stainless steel fittings using another inch and a quarter hose barb, three hose clamps. Then we go to a stainless steel coupler, then to our nipple, which goes through the well seal. Up here, there’s a couple of different options for doing this. In this case, we’re in a warmer environment, so we’re using a well seal which allows the water to go up and out the top. If you’re in colder environments you may be using what’s called a pitless adapter. We have another great video on that in case you want to learn all about pitless adapters and well caps for cold climates.
Pump Wire
If we make our way back down here you’ll see this is the wire coming out of the pump. It varies in length from pump to pump. It can be anywhere from three feet up to around 10 feet long. After that, we need a transition to submersible pump wire. Depending on our exact installation depth, we do that using these crimps, the adhesive-lined shrink tubing. We go to our 12 gauge four-strand submersible pump wire which is dual jacketed and is great for abrasion resistance. This 12 gauge wire is good for around 300 feet of insulation depth. When we go past that, we’re going to switch down gauge to around 10 gauge which is going to get us to around 500-600 feet of installation depth. We also have our safety rope which you can see here which is a yellow rope. This is optional but we do recommend installing it in case anything ever breaks or if the pipe falls off our barb. That’s going to give us a backup method besides the power cable in order to pull the pump back up.
Above Ground Components
Great! So that’s an overview of all the different components down our well. So we’ll come on over to our well site. You can see our four inch well casing over to my right here and we brought all the equipment you’re going to get with our Pro Systems. Let me run through that equipment and then we’ll talk about what else you’re going to need to complete your installation.
So over to my right, back behind, we have the Pro Controller. This is the brain of the system. It’s going to take the power from the solar panels and drive it down to the pump. It’s also going to take care of functions like “tank full” and “well low” sensors in case your run well is running low on water. We have our pump end here, our motor, and then all of our accessories. So our accessories include a DC disconnect, the solar panel wire, which you’re going to need to run from your solar panels to your controller. It also comes with the keypad. The keypad allows us to check the status of the controller or make any adjustments as necessary. Now the controller comes pre-programmed so you’re not going to need it right off the bat. Put it in a safe place in case you ever need it for the future. We also have our barb. It’s an inch and a quarter to inch and a quarter barb. If you’re using an inch and a quarter poly pipe, you can also go to a one inch barb in case you’re using one inch poly pipe. We have a couple of connectors. I’ll show you how those go into the controller when we start our installation. We also have our float switch.
Float Switch
Our float switch is for tank full operation and also goes into the controller, that way when the tank is full you don’t overflow the tank. It sends a signal to the controller that the tank’s full and tells the system to shut down. Also behind me, you see our solar panels. Depending on the exact system you purchase it’ll either come with 100 watt or much larger around 350 to 380 watt solar panels. Also, the number of these solar panels varies depending on the power of your system. Higher power systems use more panels. So those are all the parts that come with the Pro System Kit.
To give you maximum flexibility to choose exactly how you want to do the installation, you’re going to need a couple of other parts. You can either get most of them from us or you can source them locally. Let me grab those parts and we’ll give you a quick overview of what they all are. The first of those parts is the drop pipe. There’s a lot of different options on the drop pipe needed including the diameter and material. We have an entire video about that. Check it out if you want in-depth information. In this case, we’re using one inch black poly pipe 160 psi. This is gonna work perfect for this application. We’re pumping around 15 to 20 gallons per minute. We also have our drop wire. For the Pro System pump, you need four strand submersible pump wire that has three strands plus one green ground wire. We recommend using safety rope. This is an inch and a quarter polypropylene safety rope. If you’re going deeper, then you can use larger diameters, say a half to 3/ 8 inch. If you’re going really deep you might want to switch to steel cable.
Solar Panel Mount
The last part is the solar panel mount. Now we offer lots of different mounting options or you can get creative and build your own. We’d love to see all of our customers building all types of different mounts to fit their specific application, but if you want something really simple you can either use our top of pole mount, which holds up to eight panels or our scalable ground mount. The scalable ground mount is a fixed ground mount. It’ll hold as many panels as you need, whether you’re mounting five panels or whether you’re mounting 20 panels. It’s going to be able to expand out to match your installation.
Connecting Pump and Motor
Great! So these are all the pieces for our install day. Let’s start putting together and getting this pump in the ground. The first part of our installation process is hooking up our pump and motor. Now they’re shipped separately, but with only four bolts we can hook them together and get them connected ready for installation. Our stainless steel motor is located here and the four bolts are attached. We also have our stainless steel pump end. This is a one horsepower pump end and it produces around 18 gallons per minute at 184 feet of head. Now we’re going a little bit shallower but it’s still going to produce really well, probably around 20 to 25 gallons per minute at our shallower pump end.
We need to connect our pump end to our motor using the four bolts and provided nuts. We’re gonna need two tools for this part. We’re gonna need a wrench and a screwdriver in order to remove the wire cover. So we have a shield installed to protect the wire and the strain relief at the top to prevent the wires from fatiguing. Next we’re gonna move on, we’re gonna do our plumbing fittings and then we’re gonna do our splice for our drop wire. This specific pump end is an inch and a quarter outlet and I’m going to go to a one inch barb. We’re gonna go to a one inch barb because we’re using one inch polypipe today, but if you’re using inch and a quarter poly pipe then you use an inch and a quarter threaded fitting to inch and a quarter barb. That one looks like this. They come in various lengths for deeper installs. We tend to go with a longer barb so we can have more clamps on it and more holding power. In this case, we will be using a check valve: so we’re going to come out of our pump with the inch and a quarter nipple, we’re going to go to our inch and a quarter check valve and then our inch and a quarter to one inch barb fitting.
Pump Wire Splicing
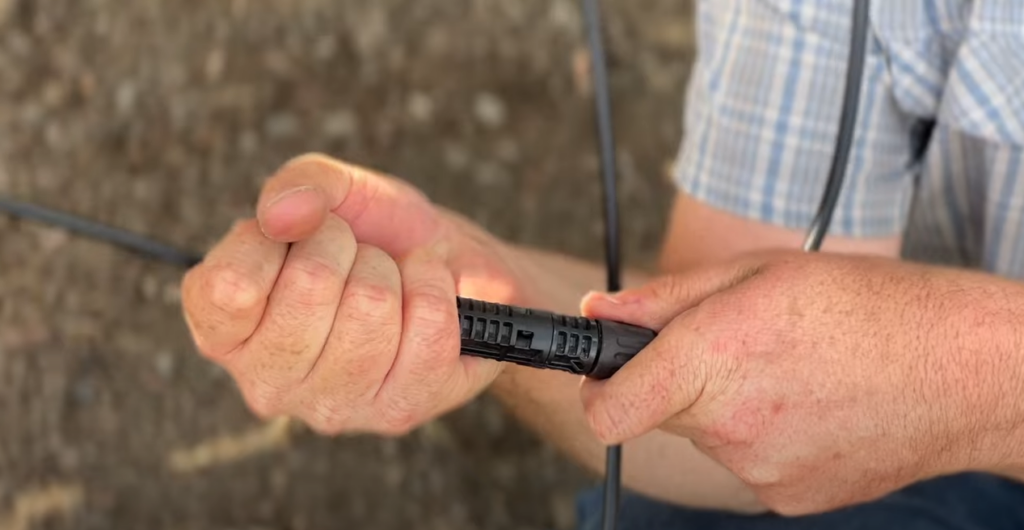
Let’s get these all installed. We’re going to use a little teflon tape to make sure we have a good seal and no leaks. So let’s go ahead, let’s go do our splice. Before we attach our poly pipe, I’m going to grab our three strand submersible pump wire. This wire is 10 gauge but depending on the depth of your installation, you can either use 12 gauge, 10 gauge or even lower if you’re going significantly deeper. Now this has three strands, so we’re going to attach it to the three strands matching the same colors using our provided splice kit. Just remember before you do every splice, put on your shrink tubing. If you do your splice first, there’s no way to get the shrink tubing on. You’re gonna have to undo it, put your shrink tubing on, then get another splice and redo it . When doing the splice, we’re gonna need a couple of tools. One is a wire stripper and this one actually has a built-in crimper, so we can use it for performing the crimp. We need a torch or other heat source as well. In this case we’re using a mini torch. You could also use a lighter or a heat gun if you have access to electricity and then a knife to cut off the insulation around our jacketed submersible pump cable.
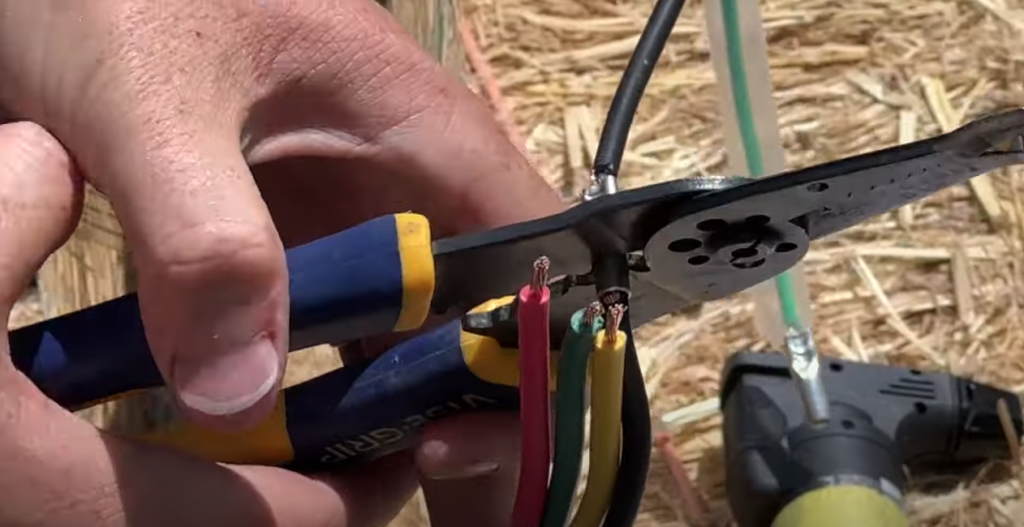
So we’ll start by stripping back the outside insulation of our pump cable, then we’ll strip all the wires. Using our crimp kit, we’ll crimp the butt crimps onto our wire, put our shrink tubing over it, crimp everything down and then heat it up using our torch. When we heat it up with our torch, we’re going to be very careful and move it quickly to prevent a hotspot or burning of the insulation. We want to watch as it shrinks down. We want to make sure a little bit of adhesive squeezes out of the end of the shrink tube. That’s going to give us a perfect waterproof seal so our splice is complete.
Connecting the Parts
Now let’s get prepared for the final installation. We’re going to stretch out our wire and pipe. You have two options here for deeper installs. Your first option is using a sawhorse. With a sawhorse, you can have the pipe and wire sitting across and as you lower it down, you can let it all rotate and feed out down into your well. Since I’m only going to around 65-70 feet, I’m going to stretch out my poly piping and wiring first. I’m going to pre-tape it since I’m installing it by myself and I want to be able to lower it all in one smooth motion. If you’re in a colder environment, this can be very important because the poly pipe can be pretty stiff when it’s cold out. You might want to lay it out, get it stretched out in the sun and try to get some of the curling out of it before you put it down your well casing. If there’s a curl and it’s cold out, it could be difficult to push it down the well. So we have our drop pipe, our drop wire, and our safety rope laid out around 60 feet. That will make for a nice easy installation.
Next, I need to hook the drop pipe up to our pump using our three provided hose clamps and a screwdriver. If you have one of these six-in-one screwdrivers it’s great because you can pull the bit out of the end and it fits right over the hex on our hose clamp. This provides a nice tight connection because you can really torque it down. We’re using one of our extended barbs here to provide maximum grip with the drop pipe for this deep installation. We’re going to put three hose clamps on that. It can be a little hard getting it all the way down, but do your best. If you run into any problems or it’s a cold temperature, you can use your torch or a heat gun to slightly heat it up. Again, don’t heat it too much, but it’ll help you get it all the way over the hose barb. Don’t forget, you want to put your hose clamps on before you put it onto your barb. All right, so we got it all the way seated on our hose barb and it took a lot of pressure. The harder it is to go on, the harder it is to pull off, which is great for these deep wells because we definitely don’t want the well pump to fall down the well.
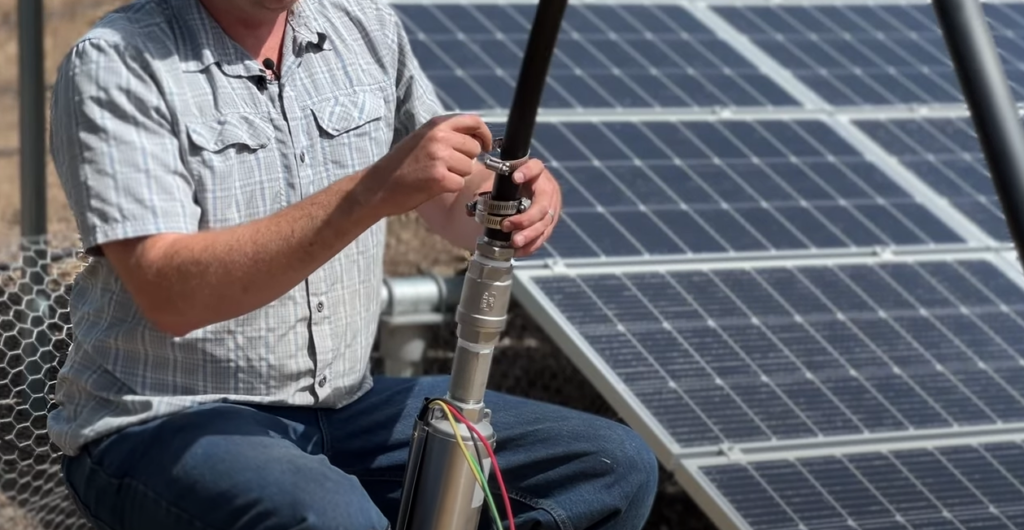
Now we’re going to screw down our hose clamps. One note about when we do the hose clamps, we want to reverse the sides that the hose clamps are on or just stagger them one third of the way around the hose barb as we tighten them. There’s a little flat spot here and that’s going to make sure we have even pressure 360 degrees around our pipe. With the six-in-one screwdriver, we get a lot of torque on these hose clamps, but just be careful you don’t strip your gears out. On each of these there’s a piece of the sheet metal sticking out and we definitely don’t want that rubbing against our wires when we’re putting it down or when the pump is operating. We’re gonna take a little electrical tape, and we’re gonna wrap those up real nicely to provide a lot of cushion. We’re going to go ahead and we’re going to attach our safety rope up to our pump. I heated the end because it was fraying. It also makes it easier to put through the eyelet.
I want to make sure we don’t have any stress on our splice. When we tape it against the pipe we can make sure there’s a little bit of extra strain relief. I’ve also seen people put a little bit of a “Z” in it. The “Z” helps if the wire gets pulled on or if our strut pipe stretches a bit. It provides a little bit more strain relief so we’re not pulling on our splices. What we don’t want to do is place direct pressure on the splices, because that’s the weak point in the wire. If we pull too hard, the wire could pull out of that splice.
Lowering the pump
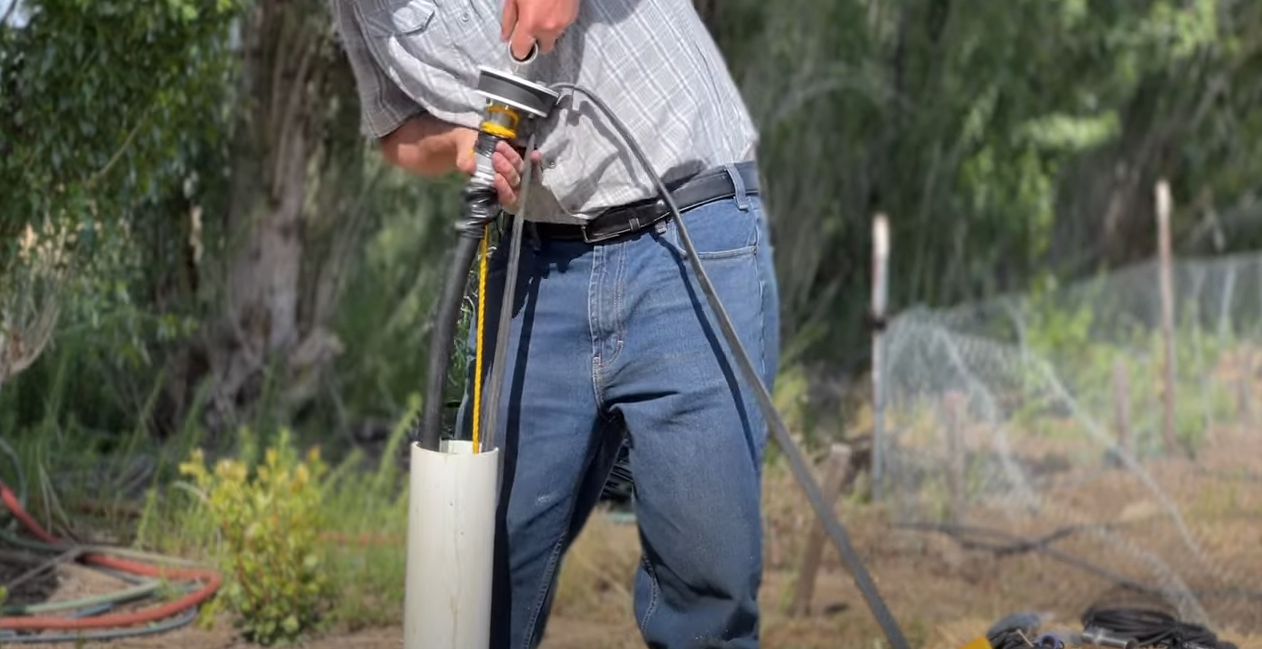
We have all our plumbing complete. We have all of our pipe, our wire, and our safety rope stretched out. We went ahead and taped it every 15 to 20 feet. We can just go ahead and lower it down. In this case, there’s two options. I’m going to go straight to the bottom. Once I get to the bottom, I’m going to come up around 5 to 10 feet and then I’m going to put the well seal on and set everything down. If you know you’re going to a specific depth, (say 300 foot) with a 300 foot roll you can pre-attach your well seal. Sometimes for the deeper installs that makes it a little bit easier because you can attach an A-frame or you can attach a winch or anything onto that well seal to do the final lowering of the pump once you get it down.
Let’s go ahead and drop this down and then we’ll get our well seal on. I’m going to put together our well seal assembly. This holds the drop pipe, the wire, the rope, basically everything in the well, off the bottom. It reacts against the casing to hold it all there. We have a complete video on all these plumbing fittings shown on the screen. So we pulled up our well pump around 10 feet off the bottom of the well. We’re going to cut our poly pipe here, install our well seal and then lower it all back down.
Great, we have the well assembly fully seated. We’re gonna get our three hose clamps and we’re going to stagger the position of the gear all the way around to make sure we have a nice tight seal. All right, so our well seal assembly is attached. We’re gonna do the final lowering of the pump in the well, getting it seated on our well seal. There you have it!
The pump is now around 10 feet off the bottom. We have everything hanging off our well seal and there are four bolts to tighten it onto the well casing. In general, I don’t tighten those bolts up. Over time, they can rust and in the sun that rubber can get hard. Then your well seal is going to be stuck on your well. There’s plenty of sealing action going around here without tying those bolts. If you want to go ahead and snug them up, it’ll make a really tight seal and keep any bugs and moisture out. I’ve come around to the back side of our panels and we’re going to do the electrical connections for our solar array.
Solar Panel Connections
For a majority of the Pro Series, up to the three horsepower, we’re going to put all of our panels in series. Up ahead over there, I’ve already done a majority of the connections. That means we’re gonna do plus to minus for each of the panels. Here we have our minus connection coming from the panel and we’re going to plug it in to our positive connection from our adjacent panel. With each of them, we want to see that click! Now everything’s connected in series, you do want to cover up your solar array with a tarp or other cloth if possible. That’s going to minimize the amount of power production while you’re doing all these connections. Just be careful, we’re getting high voltage here, so we want to do all the connections with the system OFF for maximum safety. This is the 20 foot of solar extension wire that comes with the kit. We’re gonna do our final two connections with all the panels in series down at the bottom over there. We’re gonna run it up over and onto the input of our dc disconnect. Now that we have the solar input going into our dc disconnect, we’ll use our two small jumpers to connect the dc disconnect up to our Pro Controller.
All right, so we have our solar electrical connections complete. Next, we’re going to put the connector onto our pump wire and hook it up to the controller. I’ve gone ahead and stripped back the wires on the end of our submersible pump cable and I grabbed our connector kit. There’s two connectors in here: one is for our pump wire and one is for the optional ac input. If you want to run your Pro System off of a 240 volt generator or utility power, we use the ac input connector to make our own pigtail to the specific plug for your generator. For today, I’m just going to use the pump cable. We’ve added our connector onto the end of our drop wire and now it’s time to hook it up to the controller. I also haven’t hooked up our float switch yet. Our float switch is located here and there is a connector that goes with it with a small little pigtail. You also received a little crimp kit to go with it. I’m not going to install this right now. I’m going to put it in the tank later.
Pumping Water!
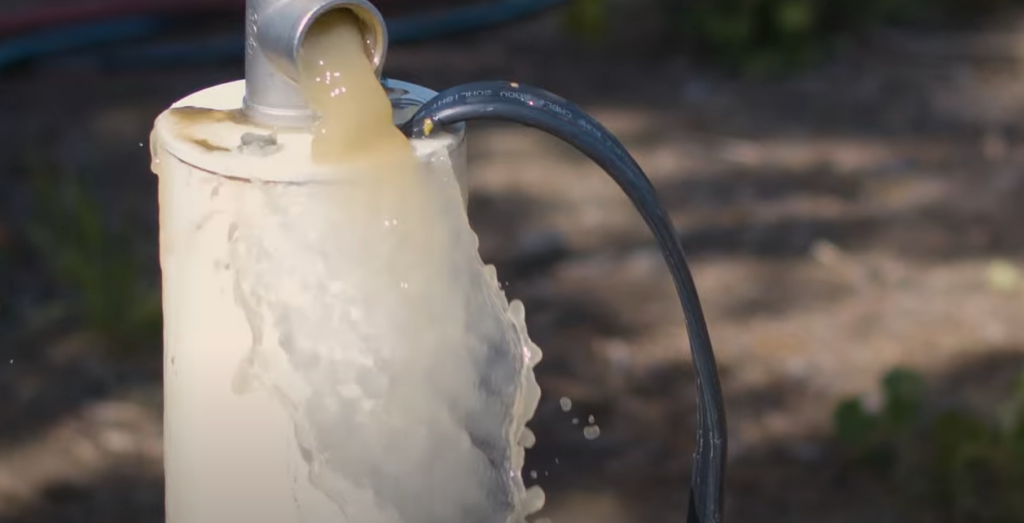
Let’s go ahead and turn it on and see if we have everything hooked up correctly. If so, we should see a little water coming out of our well. With the flip of a switch we’re up and pumping water with the power of the sun! You can see in only a couple of minutes the water is clearing up nicely, getting all of the install debris up and out. That’s how you install one of our Pro Series Pumps! Let’s get this loaded off and shipped out to our customer.